Charming Coop Assembly
**Please Note: All of our assembly instructions include proprietary information; therefore, your instructions will be sent 48 hours prior to shipment. So, watch your email for updates from our flock!

Step-by-Step Instructions
Step 1
Make sure the site is level. Place the floor on the site making sure the treated skids are the main contact with the site surface. If needed, you can shim these skids to make the floor level.
Step 2
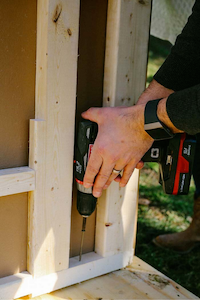
Set the back wall first. Make a mark 1 ½” in from each side. Put the back wall to these marks leaving room to install the side walls up against the back wall. Use 3” screws and fasten the walls to the floor through the bottom 2x4’ on both ends.
*Note: The siding for all the walls will set below the floor ~2”
Step 3
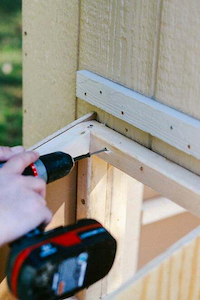
Set the side walls next. Fasten to the floor, and back wall, using the 3” screws provided.
These walls are interchangeable; therefore, the run door can go on either side
Step 4
Install the front wall following the same pattern as the others.
Make sure all the walls are securely fastened to the floor and to each other.
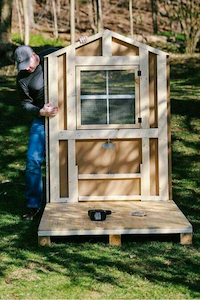
Step 5
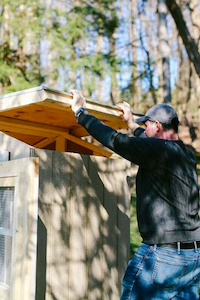
Install the roof sections. These sections simply fit over the top of the walls. Fasten through the 2x4’s into the walls.
Fasten on all 3 sides.
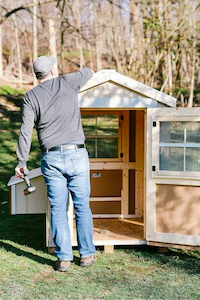
Step 6
Install the roof ridge piece. The metal screws for this are self-tapping, so you do not need to pre-drill any holes.
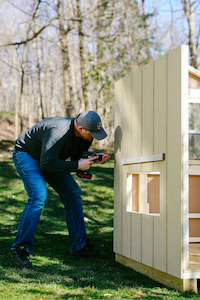
Step 7
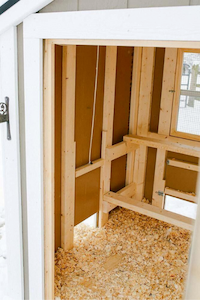
Install the Nesting box. Hold the box up against the opening and make sure it’s even with the opening on all sides. There will be a gap between the box and the exterior trim piece; this is for the nesting box roof. Fasten the box with 3” screws, 2 on the top of the box, 2 on the bottom, and 1 on each side.

Step 8
Install the nesting box lid. Line the lid up with the trim piece. Fasten the hinge directly to the trim piece. Use the small screws provided.
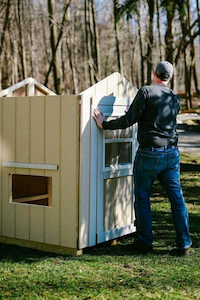
Step 9
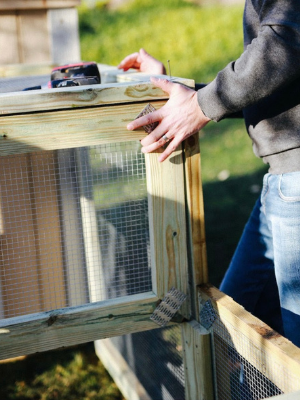
Install the Clean-Out-The-Coop™ Door. From inside the coop, the door slides into the opening, gliding along the grooves provided for it. A hook is provided to hold the door open when cleaning your coop.
Step 10
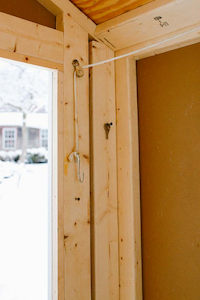
Install your run door. Follow the same pattern as the Clean-Out-The-Coop™ Door. Install the pulleys: one directly above the run opening, and the other beside the main door. You will need to fasten the rope through the hole in the top of the run door. Run this rope to the pulley directly above the run, over and through the other pulley beside the door. Fasten the O ring provided to the end of the rope. Hold the door open and mark the top of the O ring to show you where to put a screw to hold the door open. Leave about 1 ½” of this screw revealed so that the O ring can slip over the screw holding the run door open.
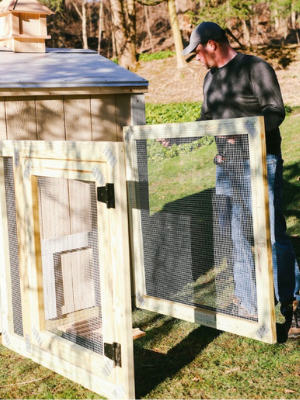
Flowerbox Run Assembly
Flowerbox Run Assembly.pdf
Identify all of the pieces of the kit. Start your layout with the 3 larger panels; one that houses the door (front door panel), another panel that is of the same size as the front door panel (back panel), and the top piece that is meant to bring these two large panels together (roof panel). Layout these pieces on the side of the coop with where you have installed the run door. Once these pieces have been laid out, proceed to Step One.
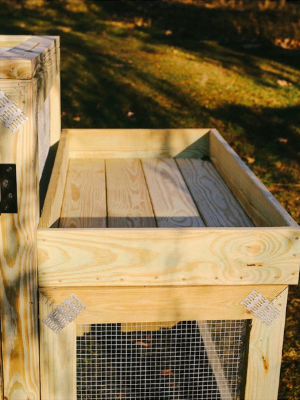
Please Note: Our Flowerbox Run Panels are New and Improved. At just under 5 ft tall, they will sit just beneath the roofline - taller than pictured below.
Step 1
Locate 2 small blocks of wood (1"×1-1/2"×3). Screw these blocks directly to the bottom corner of the front door panel and back panel on the edges that will connect to the coop. These blocks prevent predator access in the gap below the corner trim of the coop and the ground once the run is attached to the coop.
Next set the front door panel and back panel in place next to coop.
Step 2
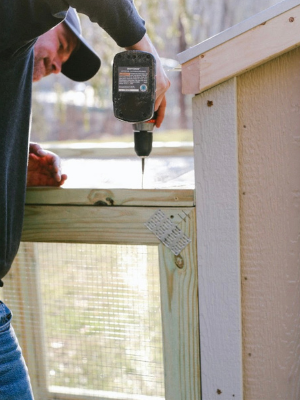
Identify the edge of the roof panel with a smaller strip of wood attached. Turn that edge toward the coop. Using the larger screws provided, put the first section of your run together by placing the roof panel over the side panels and adhere with 3 screws on both edges.
Then, ensuring the run is centered, screw in the large part of the run against the coop wall using the predrilled pilot holes.
Step 3
Then take the smaller panels,
and put together the stepped down lower part of the run using a combination of the larger screws with the following note.
Note: Use the smaller screws by where the two boxes meet as the board is not deep enough to handle the larger screws.
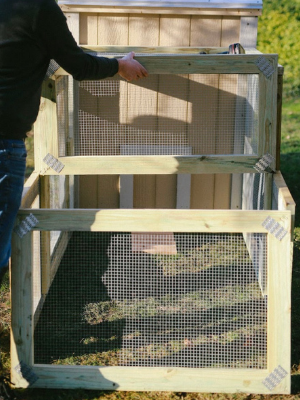
Step 4
Close in the side of the larger area of the run with a smaller panel while making sure it fits snug in between the large side panels, these panels should not overlap.

Step 5
Place the flowerbox on top of the smaller area of the run and secure it with the remaining available screws in the four corners of the flowerbox using the larger screws.
Step 6
Finally, put the door handle in the hole on the door and with using the Allen key provided, secure it from the inside of the run.